


For this "Card" I chose to use the "On the Farm Marci Rubber Stamp"
The templates for this card are pictured below as well as the measurements.
Step-by-Step
Step 1
Cut a card base, 4 1/4" x 11”.
Score at 5 1/2" on the long side.

Fold the cardstock into a top-fold A2 card. Decorate the card front as desired. (This can be done later but is easier to do at this time while the card base is flat.)
NOTE:
The inside panels can also be lined with paper at this time, however part of the panel will be covered by the pop-up mechanism. If you want more of this layer to show, wait until step 9 to line the inside of the card.

Cut cardstock for the pop-up mechanism, 3” x 8”.
Score down at the center of both sides – at 4” on the long side and 1 1/2" on the short side.
Step 4
Mark at 2 1/2" from each corner with a pencil, on the top and bottom edge of the cardstock.
Score an X from mark to mark. The center of the X should match the center of the cardstock where the other score lines intersect.

Burnish all score lines with a bone folder, folding both ways on each fold.

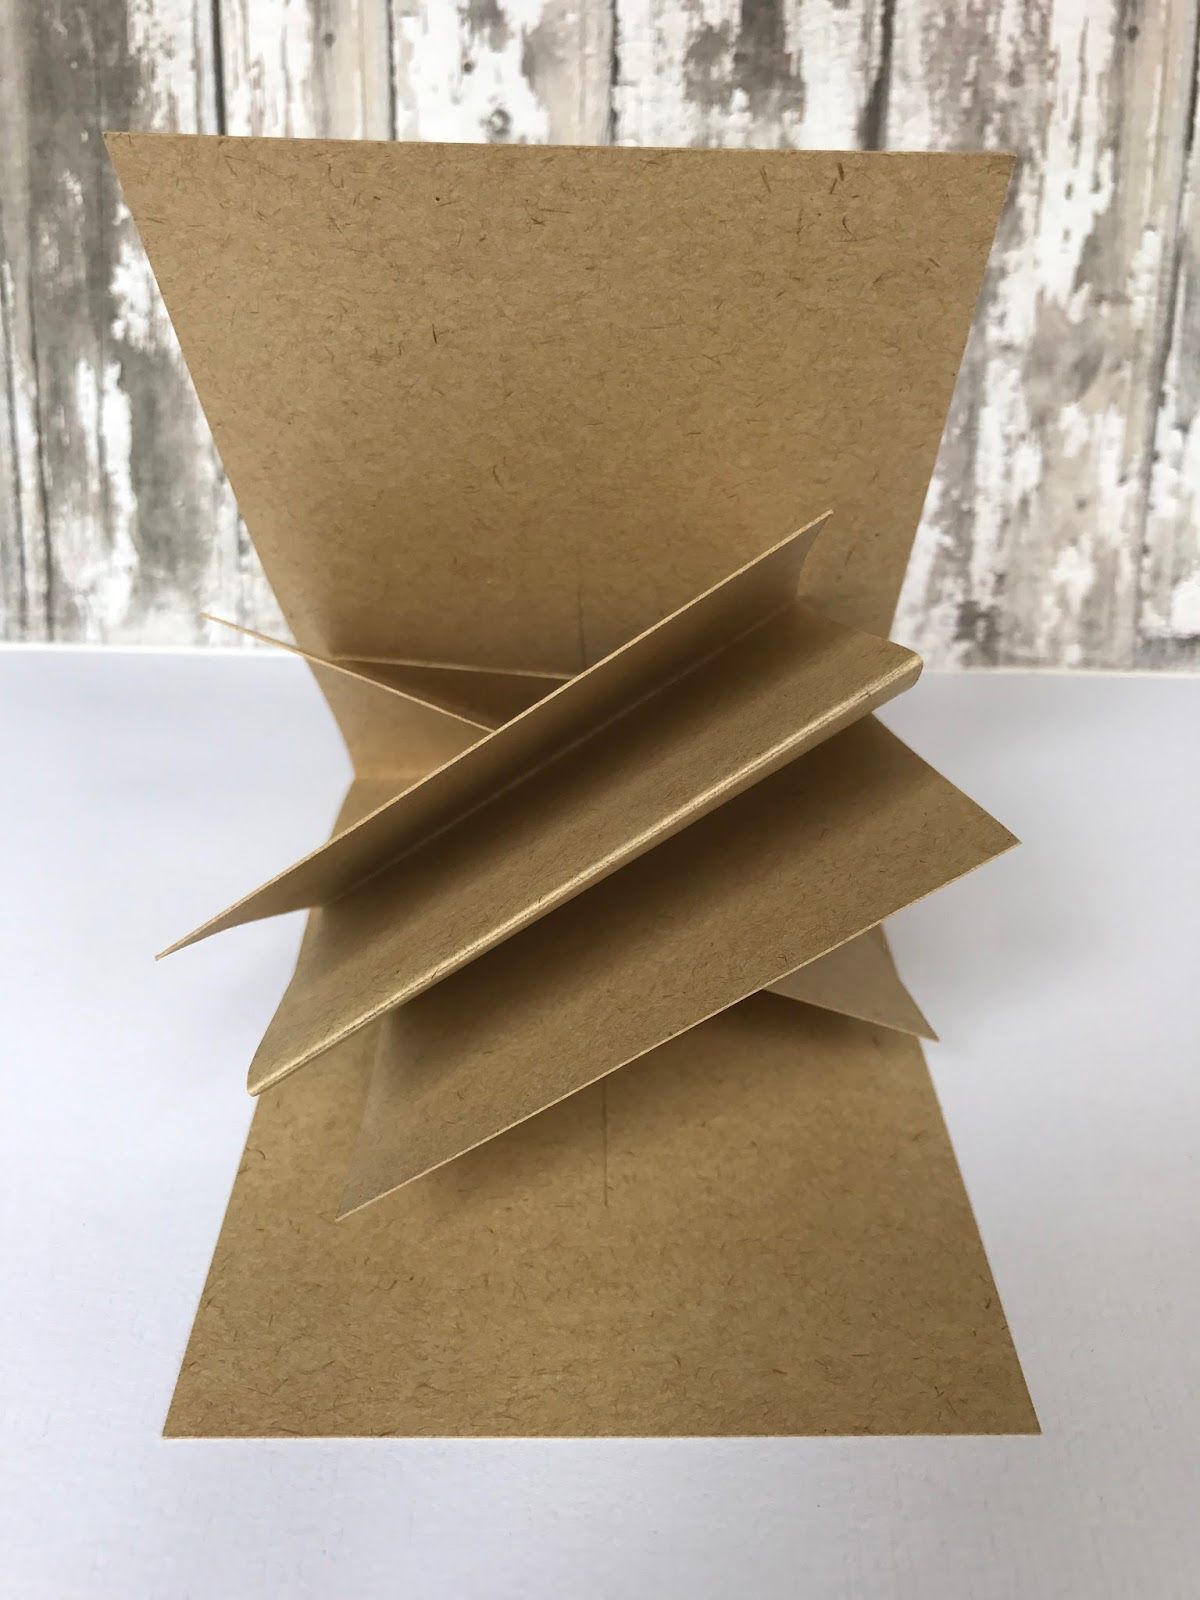
Push the long center score lines toward each other until they meet. Fold the sides back. The center X should form triangles front and back, with the folded sections inside, folds together.
The folded pop-up mechanism should look like this.
Step 7
Mark the center point on the fold of the card base, 2 1/8".
Center and adhere one side of the pop-up mechanism, gluing only the triangular area. Close the card to be sure the point does not interfere with the fold.

Add adhesive to the triangle facing upward, and close the card to adhere it into place.

Allow the glue to dry, and test the pop-up mechanism by opening and closing the card.

Cut cardstock for the focal piece, 3 3/4" x 11”.
Score at 2 3/4" from each end on the back side, if the cardstock has an obvious front and back (print or texture).


Fold the panel into a W shaped booklet and burnish the folds.

Embellish the panels as desired.
Each panel will accommodate an ATC sized panel, 2 1/2" x 3 1/2”.
Step 13
Apply adhesive to the pop-up mechanism as shown, above the fold on the right side, covering about 1” from the end.
Close the card to apply the adhesive to the booklet. Allow the glue to dry before moving to the next step.

Apply adhesive to the other side of the pop-up mechanism as shown, below the fold on the left side, covering about 1” from the end.

Close the card to apply the adhesive to the booklet. Allow the glue to dry before moving to the next step.
Step 15
Apply adhesive to the other side of the pop-up mechanism as shown, below the fold on the left side, covering about 1” from the end.
Step 16
Close the card, bringing the booklet to the card’s edge with the left side of the mechanism closed in on top of it.

Press down to secure the adhesive and allow the project to dry completely.
Step 17
Complete the project adding the decorative elements to the card.

 |
| I use Prismacolor Pencils to coloring my beautiful Stamp |
PRISMACOLOR PENCILS:
Face: 1076, 1074, 1082 , 1069, 939, 940 , 938
Hair: 1058, 946, 940
Flowers: 996, 1008, 956, 1026, 908, 911, 120, 1032, 1034, 1011, 914
Shoes: 1058, 935, 1063, 1070
Dress: 996, 1008, 956, 1026, 1091, 1011, 1074, 1072 1068
This is the finish card:


I hope you enjoyed this new tutorial...
This is my List Supplies:
Dies: Birdcage with Bird Die, Island Die, Pierced Scalloped Circles Die (set of 4), Postage Stamps Die (set of 4),
Until next time... Happy Stamping
Irene Mendes
Click on the buttons below to find us on these social media sites:


No comments:
Post a Comment